How to Set up SpineOpt.jl
Installing Julia and SpineOpt.jl from Toolbox
Start Spine Toolbox
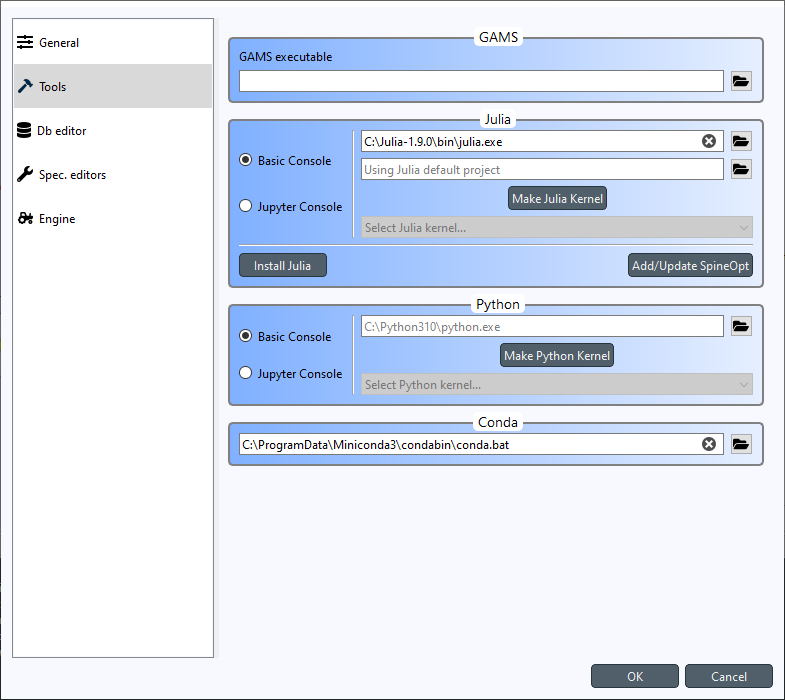
Select File -> Settings from the main menu and open the Tools page.
Click the Install Julia button. After clicking the button, Julia Installer wizard appears which guides you through the installation. Click the Next, Install Julia and Finish buttons to proceed through the installation steps. After the wizard finishes, your Julia settings should look similar to this:
Next, you need to install SpineOpt.jl Julia package. You can do this by clicking the Add/Update SpineOpt button. After clicking the button, SpineOpt Installer wizard appears. Click Next twice and finally Install SpineOpt. Wait until the process has finished and you are greeted with this screen.

Close the wizard.
Click Ok to close the Settings window
Installing the SpineOpt plugin
Note
The SpineOpt Plugin is not a requirement to run SpineOpt.jl, it is provided for convenience and as an example to get you started quickly.
Create a new project (File -> New project…)
Back in the main window, select Plugins -> Install plugin… from the menu
Select SpineOpt and click Ok. After a short while, a red SpineOpt Plugin Toolbar will appear in the main window.
Spine Toolbox and Julia are now correctly set up for running SpineOpt.jl. Next step is to verify the installation (takes you to SpineOpt documentation). See also Tutorials in SpineOpt documentation for more advanced use cases.
For more information on how to select a specific Python or Julia version, see Setting up Consoles and External Tools.